

Magnified Light
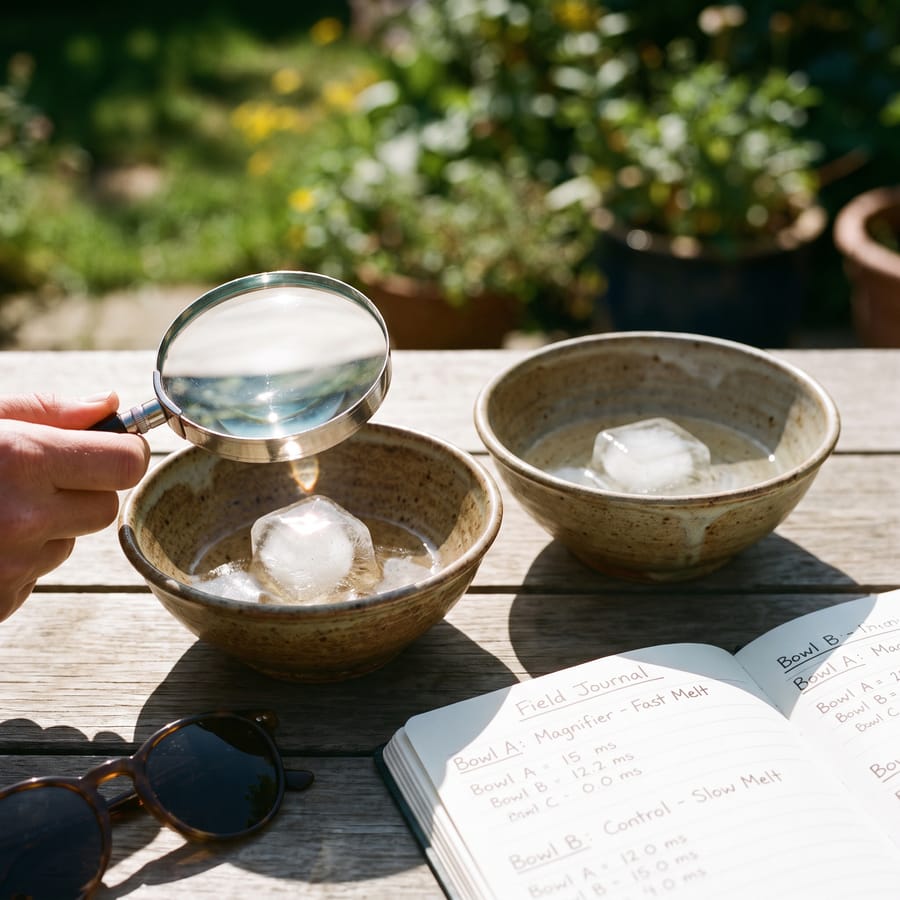
To demonstrate how sunlight can be intensified through a magnifying glass, concentrating energy to melt an ice cube.
Theory & Background
Have you ever noticed how light behaves in different situations? It's a hot day and you're bored. This makes for a perfect opportunity to conduct the Magnified Light experiment! In this experiment we'll harness the energy of the sun to melt an ice cube at an accelerated rate by concentrating a beam of sunlight on it. How long will it take for you to melt your ice cube? Let's find out!
Required Materials
- Direct sunlight
- Magnifying glass
- 2 ceramic bowls
- 2 ice cubes
- Pen or pencil (optional)
- Journal to record results (optional)
Estimated Time
About 10 minutes.
Step-By-Step Procedure
Take 2 pieces of ice from the freezer and place each one in a separate ceramic bowl.
Carry the bowls outside to a clearing where there is direct sunlight, beaming down at it's strongest point. You'll need to be clear of any shade or trees for this to work most effectively. Place the two bowls on the ground next to each other.
Take the magnifying glass and hold it up above one of the bowls so that it catches the sunlight. This part can be tricky at first, but if you hold it at the correct height and angle it should make a small beam of light on the ice cube. You may have to adjust your magnifying glass position to get the best beam. Smaller beams are the most effective.
Make sure the beam stays directed on one of the pieces of ice in the bowl. What starts to happen? Is it melting at a faster rate than the ice cube without the beam of light on it? Record the results in your journal, noting how long it takes the ice to melt. Also record the condition of the other ice cube that was left untouched by your bream. How far melted was it when your first ice cube was completely melted? Record all results. for comparison.
Experiment Tips
- This experiment will only work on a sunny and cloudless day where the strength of the sun is strong. It's recommended you wear sunglasses to protect your eyes. Once you get the hang of getting the beam aligned and focused, you can actually use it to burn your name or initials into a 2x4 piece of wood. As you move the beam across you'll see the smoke rise and a brown burn mark left in its wake. A slow and steady hand can produce names, art, designs, and more. WARNING! The beam of light will be VERY hot! Do not attempt to place your hand under the magnifying glass. Also be careful where you direct the light. The beam can be intense enough to ignite loose, dry ground brush.
Observation
How long did it take your ice to melt with the beam of light on it? Move the magnifying glass around the ice to find the beam that works the most efficiently. The smaller the beam, the more intense the heat. How long does it take for the ice to melt with the smallest, most intense beam? How about with a larger beam that covers a greater area on the ice but is less intense?
Result & Conclusion
When the sunlight passes through the magnifying glass its intensified as a concentrated energy through a single focal point. The shorter the focal length of a lens, the larger the area of the beam of light and vice versa.